When you start using any mouse, you may assume the left button is the primary one. That’s how they set it up, but not everyone is comfortable with this setup. You could be left-handed or simply prefer using the right button. Whatever your reasons are, it’s possible to change what button is considered the primary one.
How to Make the Right Button the Primary One
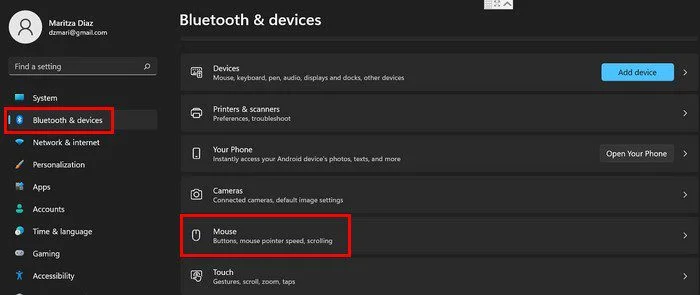
To make the right or left button the primary one, you’ll need to go into Settings. Once you’re in, go to Bluetooth and devices, followed by the Mouse option.
When the mouse section opens, the first option will be Primary mouse button. To the right, you’ll see a dropdown menu where you can choose right or left. As long as you’re there, you can also change things such as mouse pointer speed and adjust how much space you cover when scrolling with the Roll the mouse wheel to scroll option.
You can also change the mouse pointer style by going to Settings > Accessibility > Mouse pointer and touch. Choose your option; if you want to, you can also use the slider to adjust the size.
Control Panel
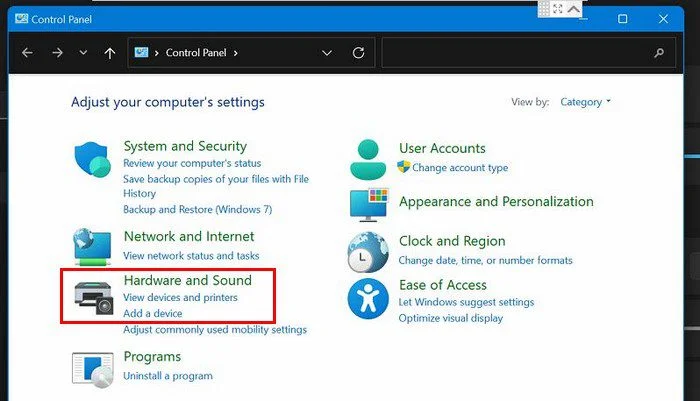
Another way you can change the primary button of your mouse is through the Control Panel. Go to the search tool and type Control Panel and open it. Once it’s open, go to Hardware and Sound.
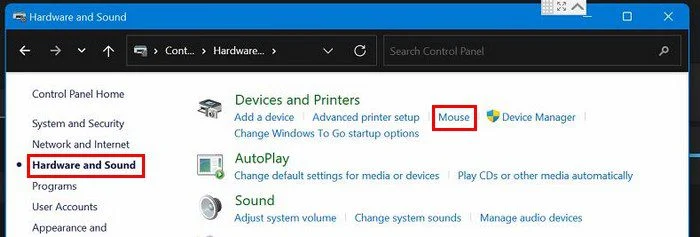
Under the Devices and Printers section, click on the Mouse option.
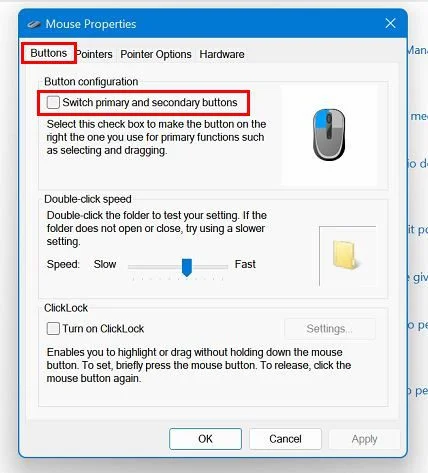
When the mouse properties windows appear, make sure you’re on the Buttons tab. Under Button Configuration, check the box for the Switch primary and secondary buttons options. You can also change the double-click speed by using the slider as long as you’re there.
At the bottom, you can also enable the ClickLock option. With this option, you can highlight or drag without having to hold down the mouse button. Click once to start using it and click once again to stop.
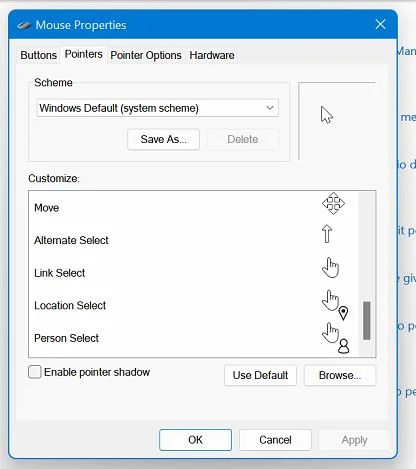
By clicking on the Pointers tab, you can customize the pointer and choose from various options. At the bottom left, there’s an option to add a shadow effect to the pointer.
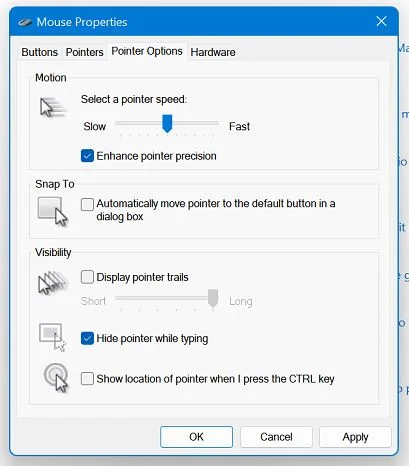
In the next tab, Pointer Options, you can adjust the pointer speed by using the slider. You can also enhance pointer precision, automatically move the pointer to the default button in a dialog box, display pointer trails, hide the pointer while typing, and show the location of the pointer when you press the CTRL-key.
SEE How to change themes in Windows 11
When you’ve made the necessary changes, don’t forget to click Apply, followed by the OK button.
SEE: How to show the mouse cursor in screenshots on Mac
The mouse pointer is something you look at a lot during the day. It’s one of the ways you choose an option and do others things as well. As you can see, you can make all sorts of changes to it. What will you be changing about it? Share your thoughts in the comments below, and don’t forget to share the article with others on social media.
Leave a Reply